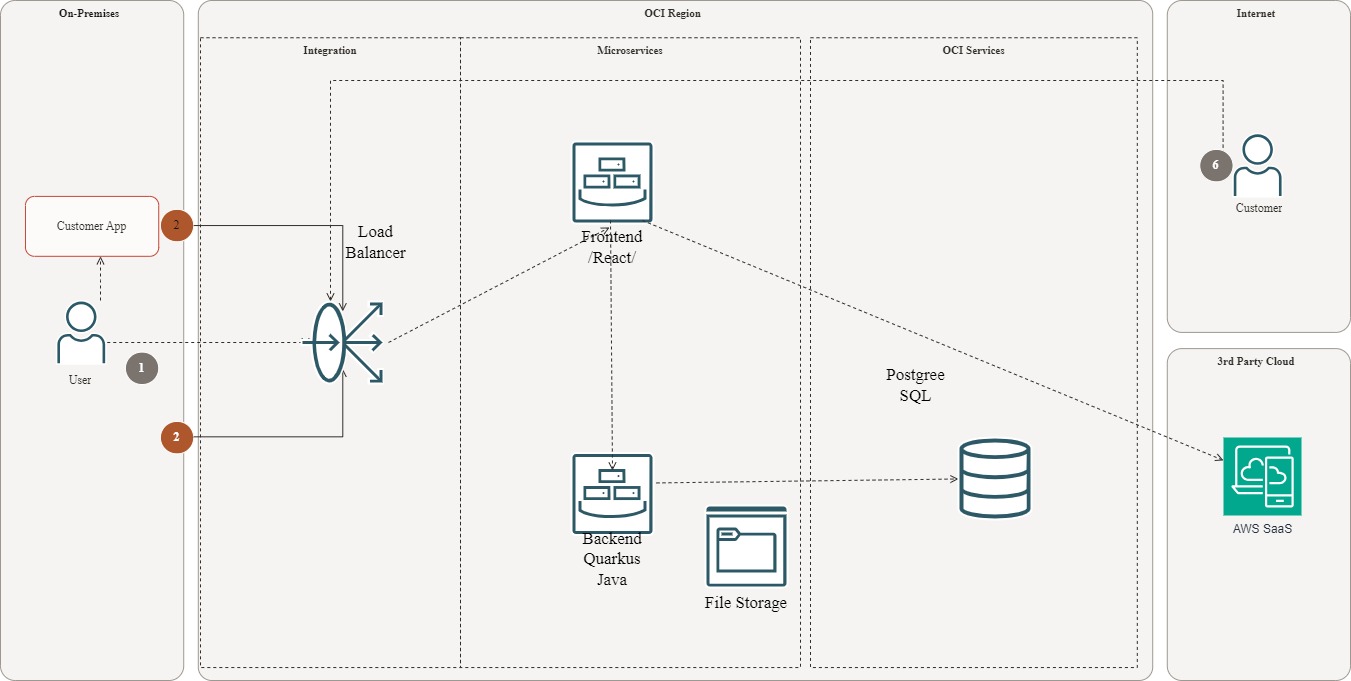
Cloud native deoployment of the fullstack app in Oracle Cloud Infrastructure
Make time to market and Return of Investment as quick as possible by deploying fullstack application to the cloud. We will demonstrate an usace using Oracle Cloud Infrastructure /OCI/ cloud.
Our fullstack application consist of :
- React UI microservice
- backend microservice exposing REST API for persistance, integration and orchestration of the user flows.
- relational database Postgree sql
- load balancer to consume incomming traffic from users and customers
The process to achieve go live can be divided into 4 phases :
- Development and containerization
- Provisioning of the needed cloud services
- Deployment to the cloud
This blog will demonstrate these phases tailored to the OCI.
Development of the frontend and the backend microservice and containerization
After developing locally with Docker desktop /Quarkus supports provisioning DB as container/ and testing the microservices needs to be delivered as a container. Here is an example to dockerize quarkus backend app:
./mvnw clean
./mvnw package
docker build -f src/main/docker/Dockerfile.jvm -t quarkus/backend-service-jvm .
docker run -i --rm -p 8080:8080 quarkus/backend-service-jvm
Provisioning of the needed cloud services
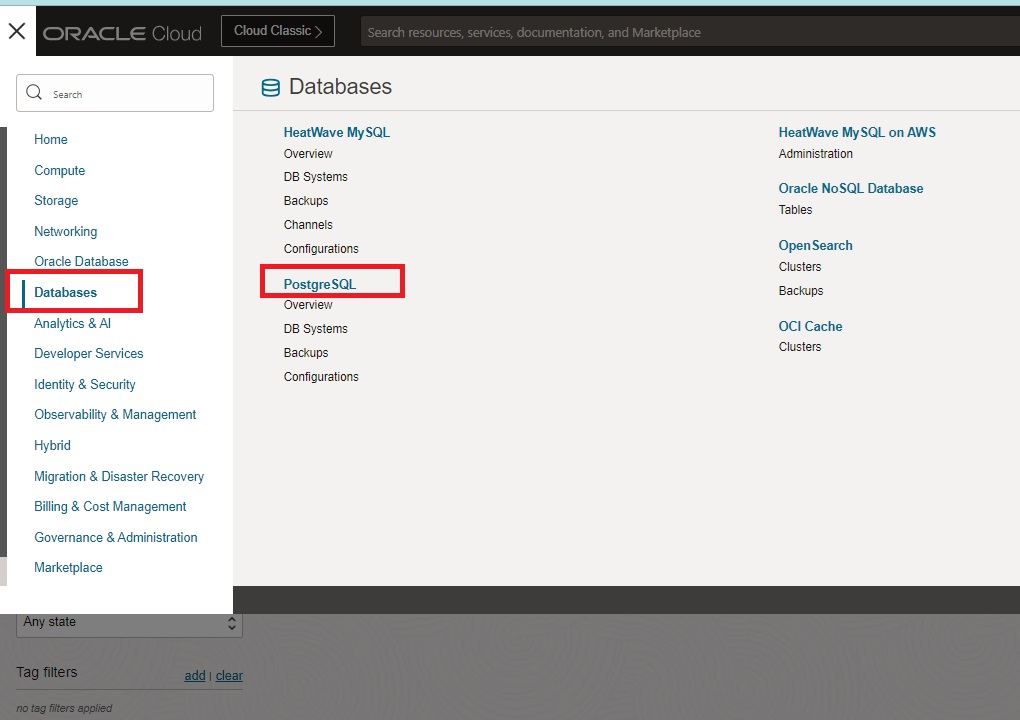
1.Postgre SQL in OCI
Navigate Databases->PostgreSQL->Database systems
Click Create PostrgreSQL Database system and complete the flow. To manage the db best use bastion, this will be described in separate blog
Youd db service is ready and you db name is matching your development
In quarkus the configuration for the database is in ./resources/application.properties
# Database Configuration
quarkus.datasource.db-kind = postgresql
quarkus.datasource.username = usernamechange
quarkus.datasource.password = passwdchange
quarkus.datasource.jdbc.url = jdbc:postgresql://10.10.10.167:5432/namedb
quarkus.datasource.jdbc.max-size=16
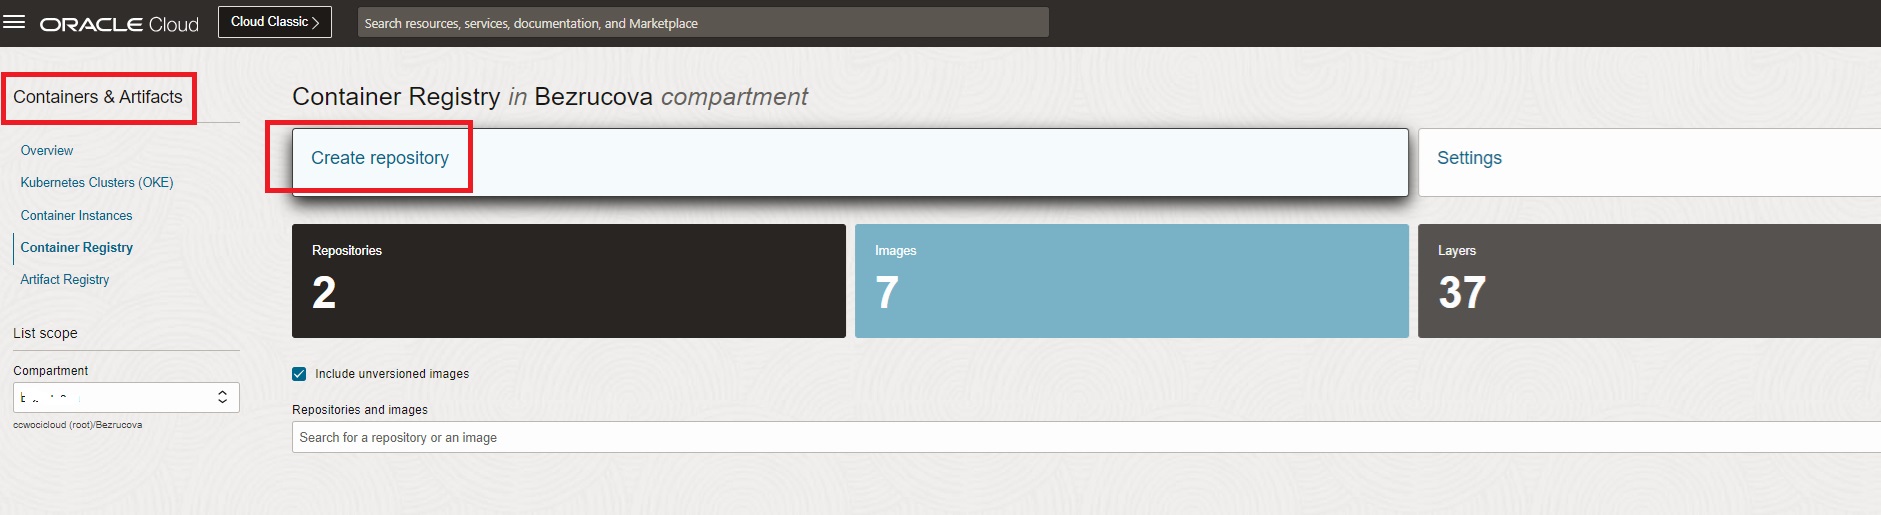
2. Provisioning of the Container Registry
Navigate to Container & Artifacts->Container Registry and click Create repository
Choose name e.g. backend-service
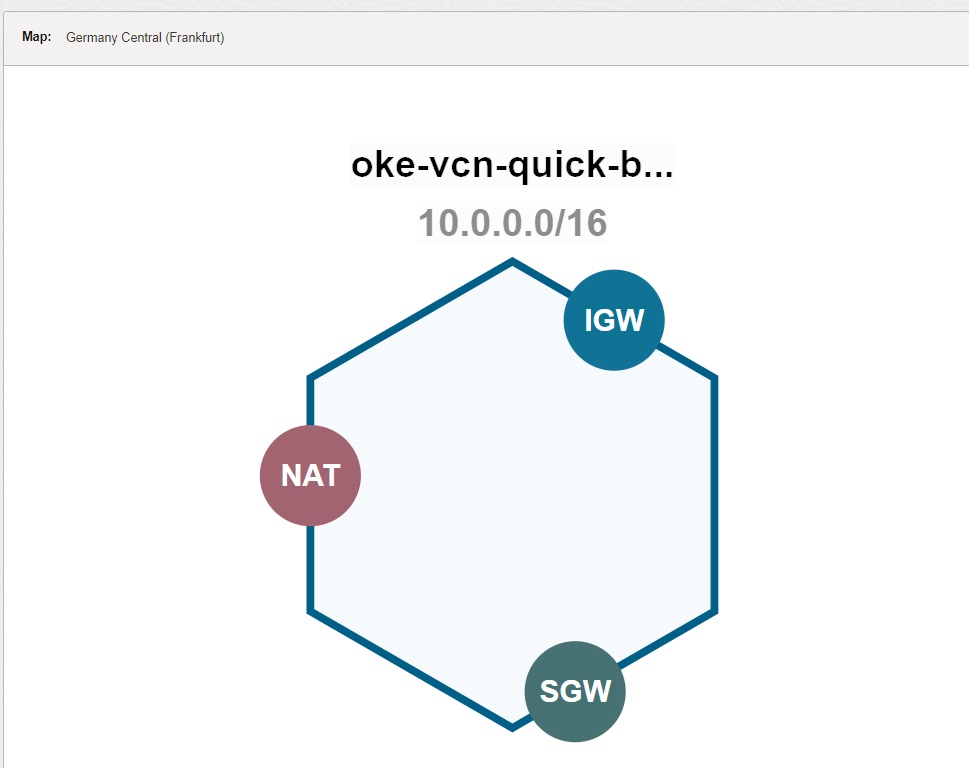
3. Provision VCN
Provision Virtual Cloud Network with Internet Gateway, Service Gateway, NAT, 1 public and 1 private subnets
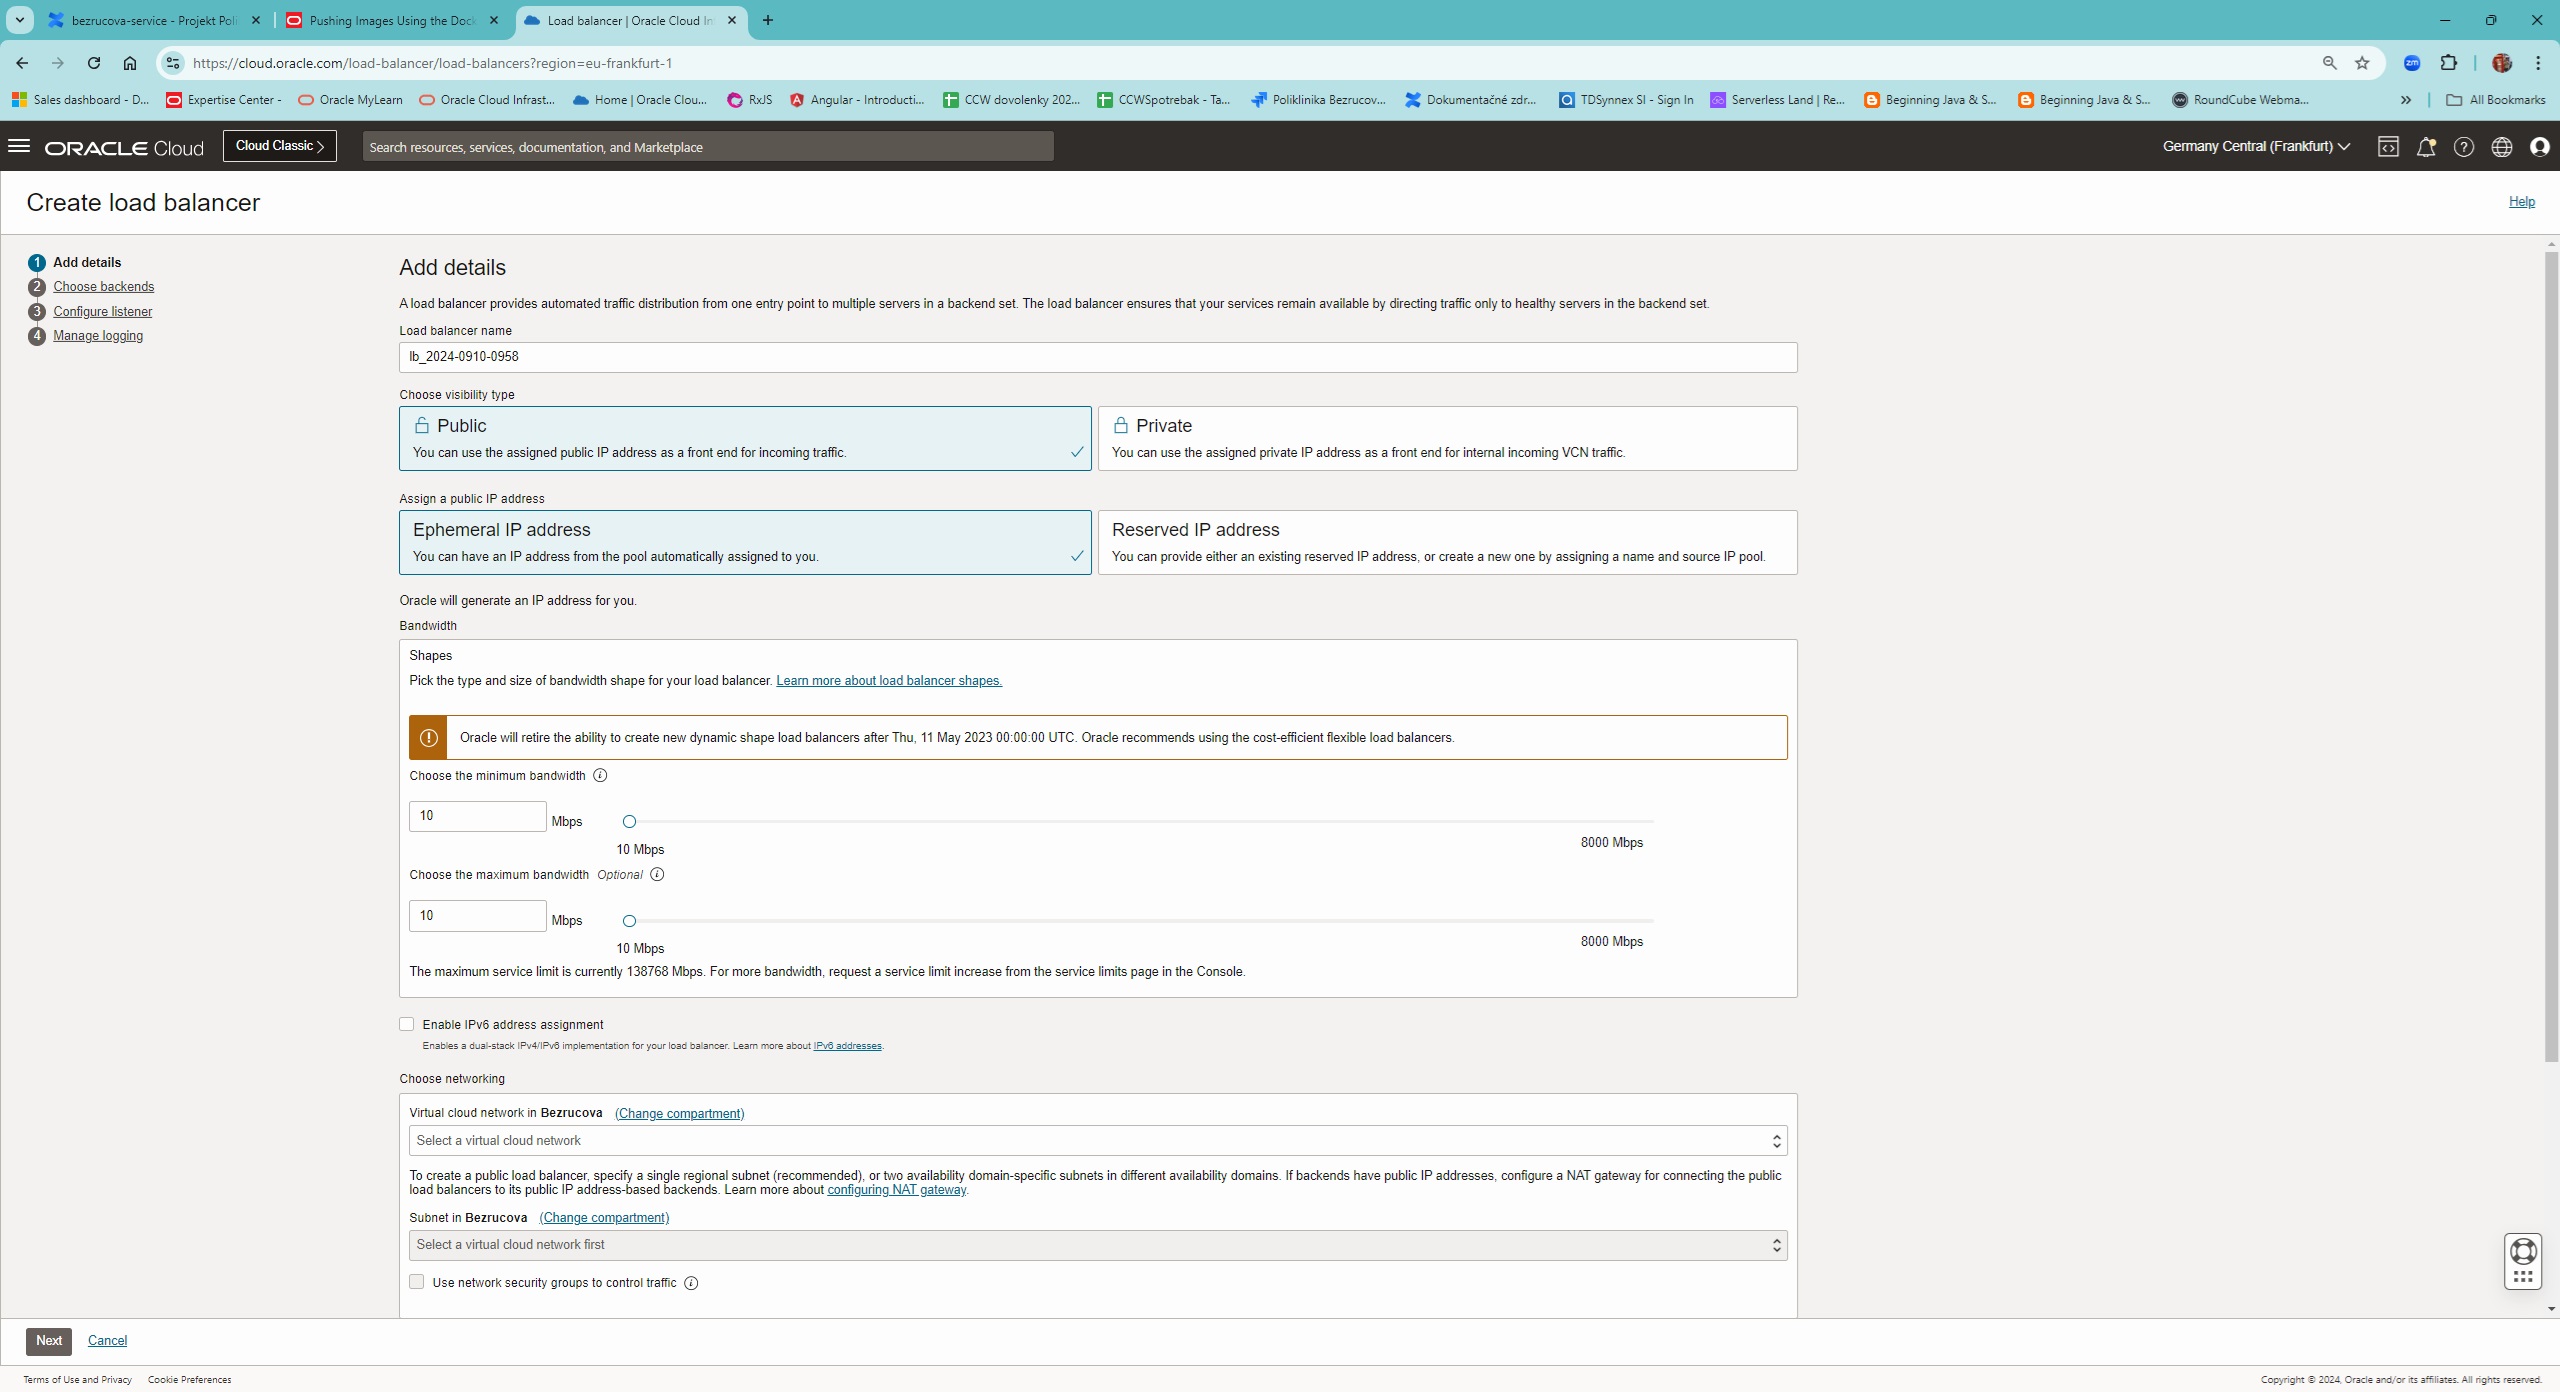
4. Provision Load Balancer
Navigate to Networking -> Load balancers -> Load balancer
Create Load balancer, assign public IP address . Backend set will be added later
Deployment to the cloud
1. Push container to the OCI created registry
docker login fra.ocir.io
docker images
docker tag ebd899d08ad8 fra.ocir.io/tenancyid/backend-service:latest
docker push  fra.ocir.io/tenancyid/backend-service:latest
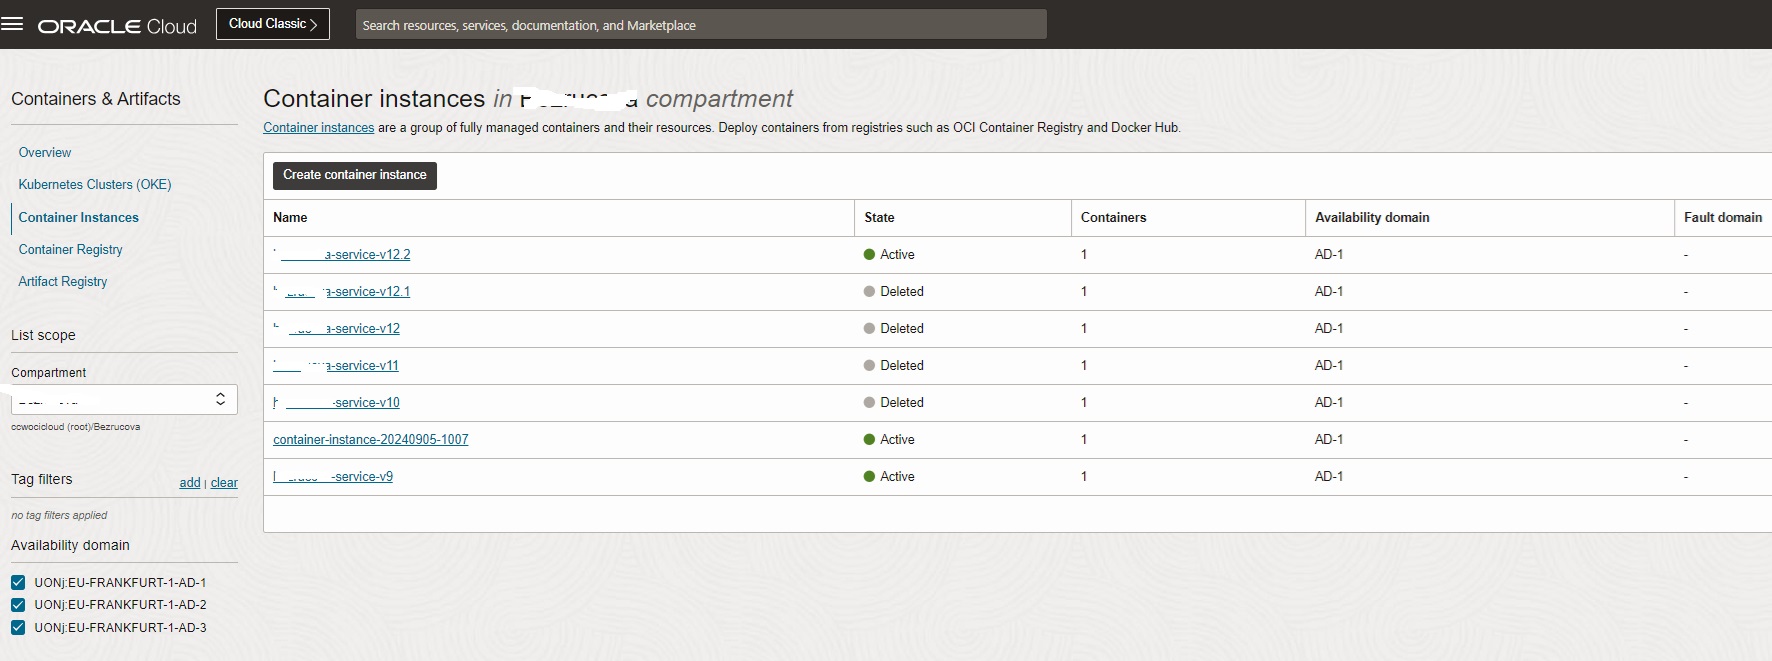
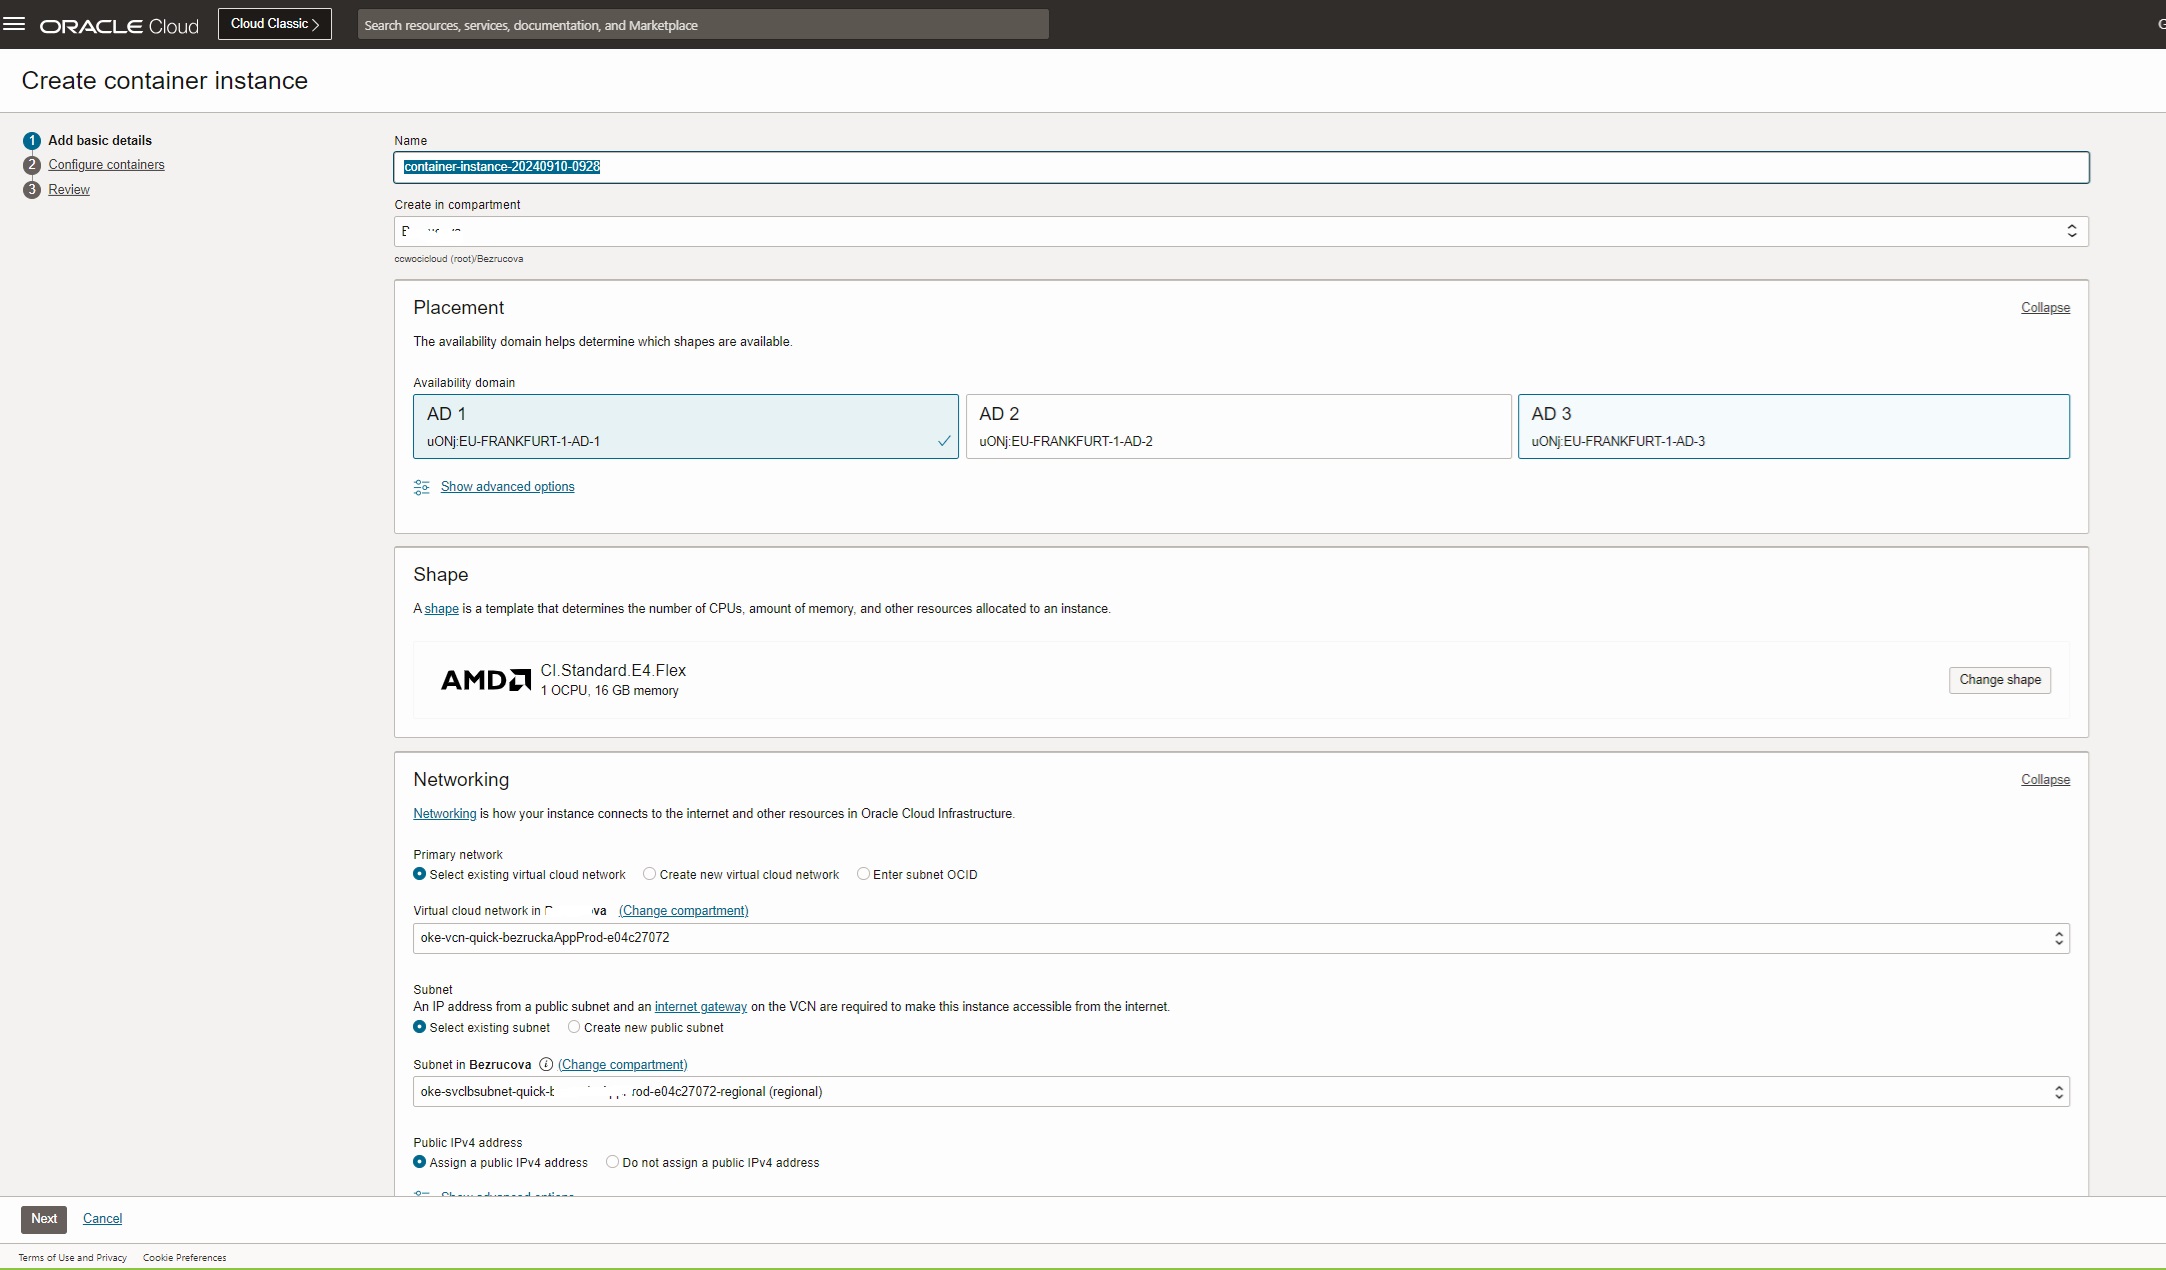
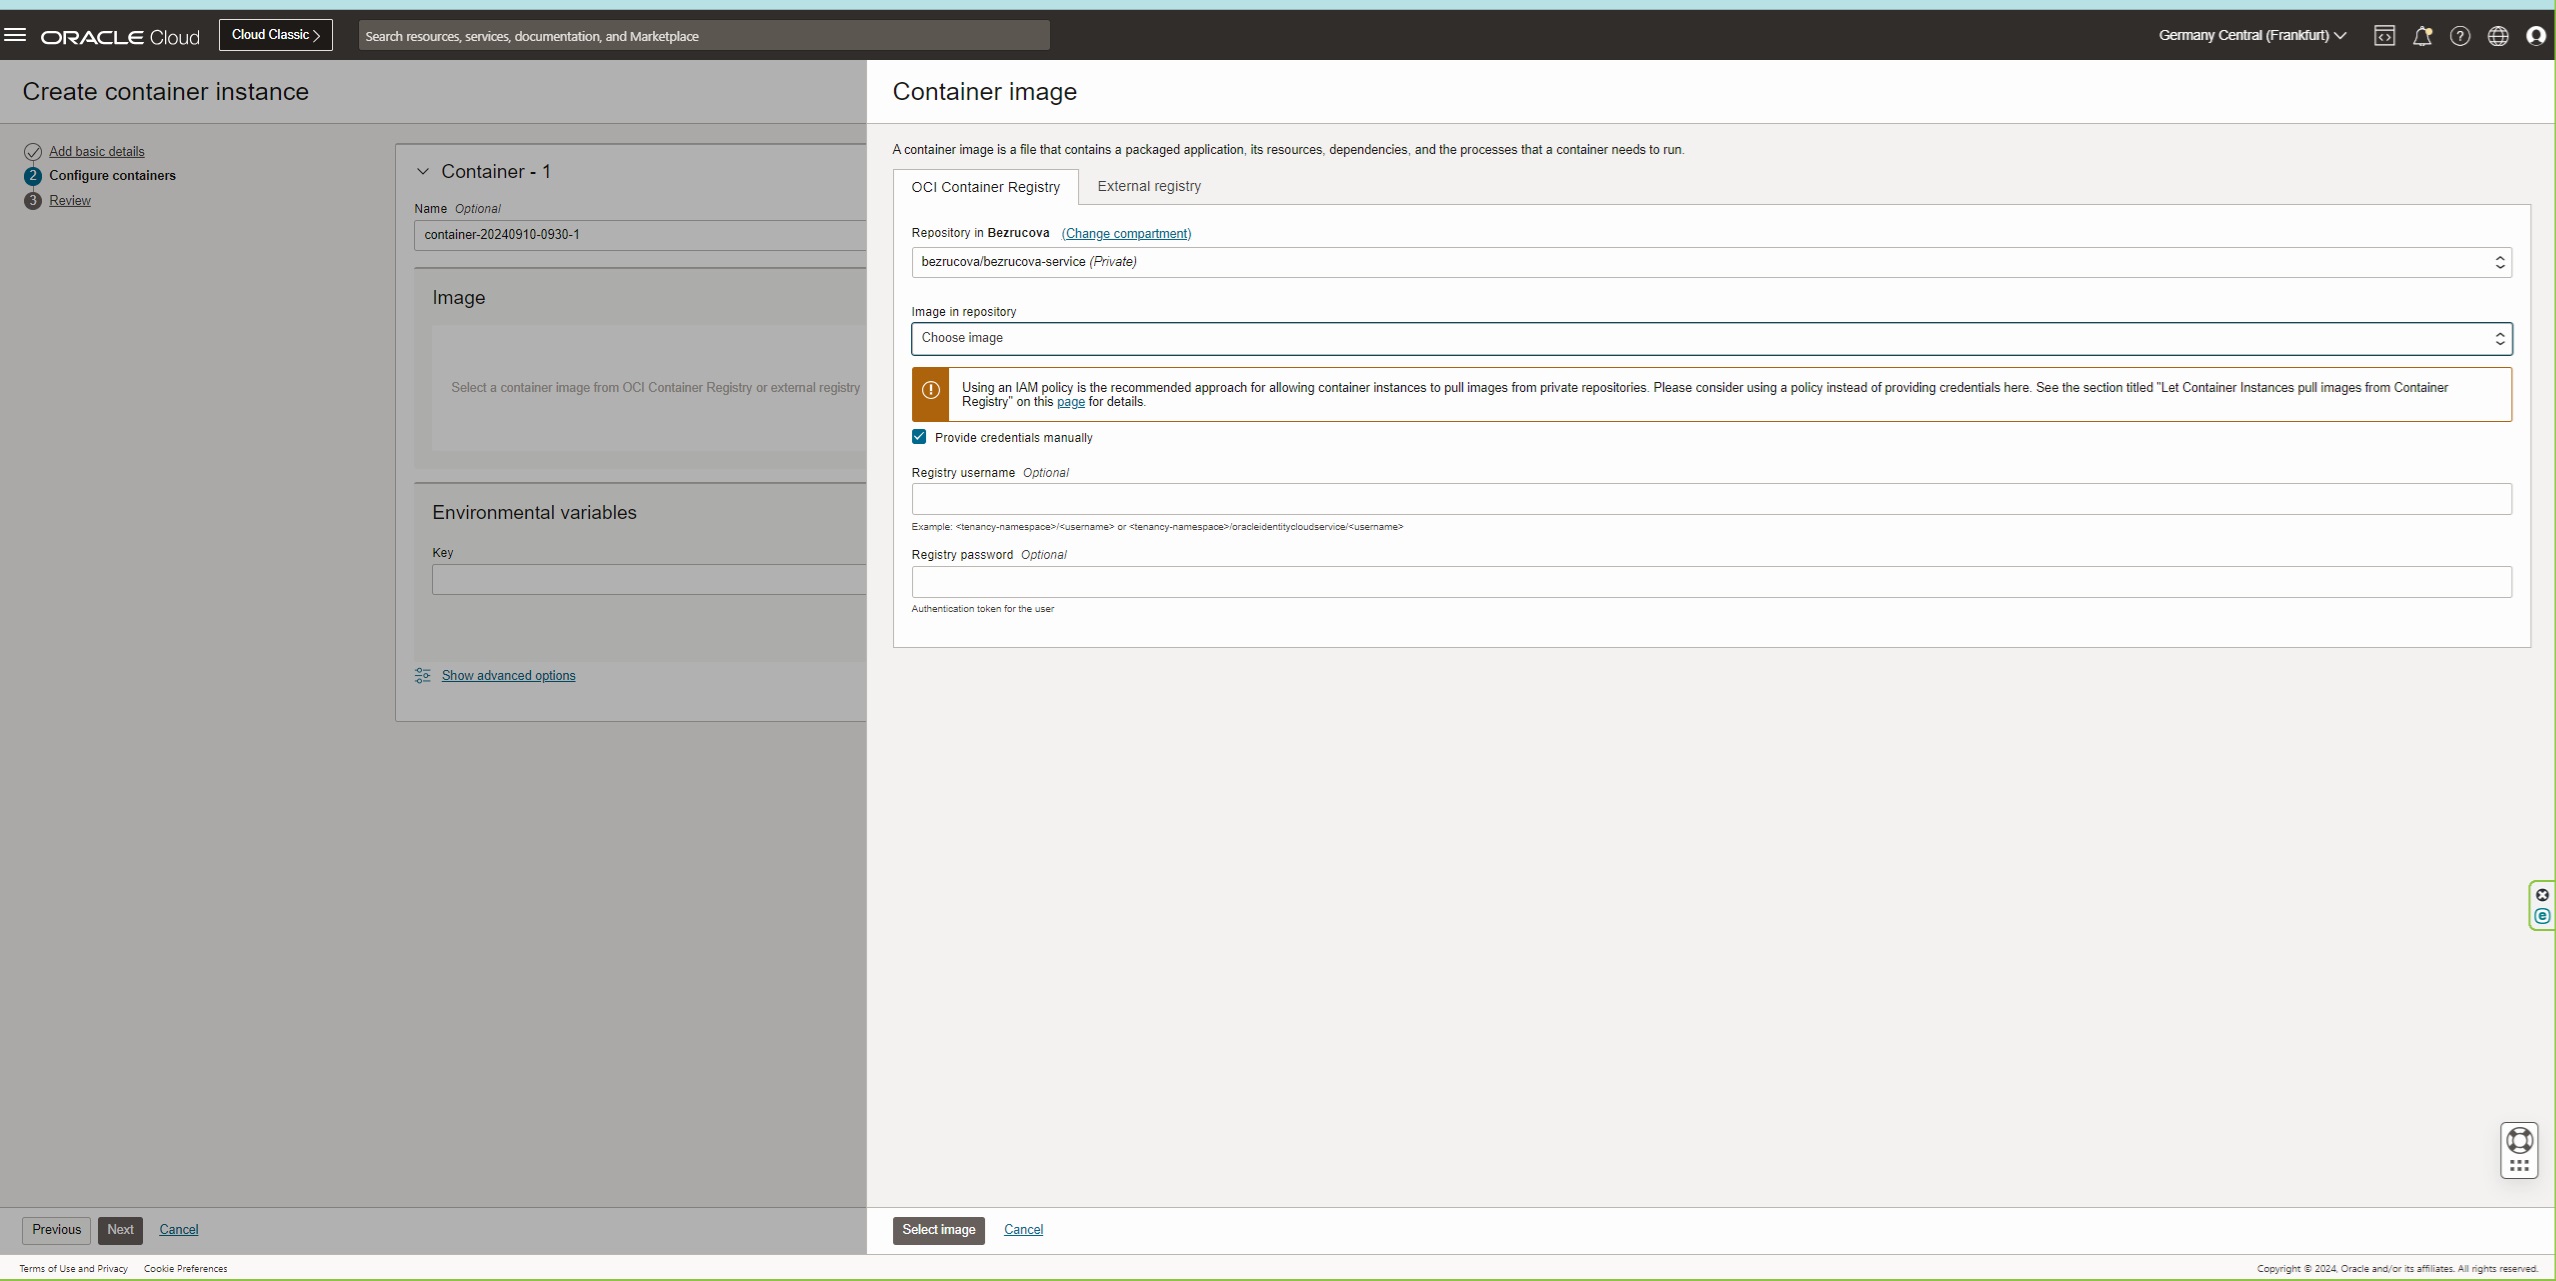
2. Create container instances from docker images
Click Create container instance, public ip is not needed because we are using load balancer with public ip with backend set to private ip. Select image and provide important login and password to the container registry.
3. Configure backend to the load balancer
There are much more cloud native possible configurations and upgrades such as using API Gateway, CI/CD configruation with B/G deployments, up/down sizing based on load, security and firewall configurations.
Contact CCW to tailor you cloud native solution in OCI fast, efficient and in highest quality.